ComfyUI is a graphical user interface for running AI models on your local machine. My article what is ComfyUI dives deeper into the topic if you want to learn more.
I did not fully understand the power of ComfyUI until I created a workflow. Once I did, 🤯. Seriously, mind blown. I get it now. If you have not installed ComfyUI yet, here is how to install ComfyUI.
My First ComfyUI Workflow
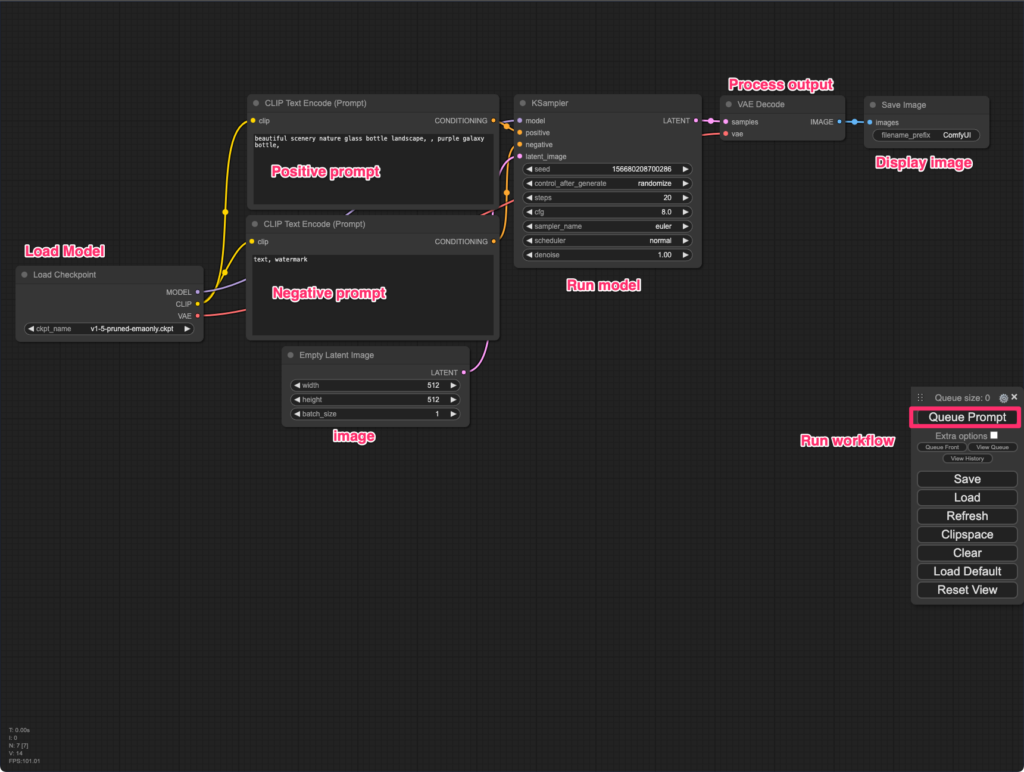
When you first install and then run ComfyUI there is a default workflow loaded. This default workflow is a set of simple image generation nodes.
First you load the model. Then you provide two prompts, a positive and negative. Then the image is generated by the model, run through vae and then previewed on screen. Very cool, but I am not using using image generation in my day to day life.
What if I could find something more practical.
I have spent hours removing the background from images. E-commerce, social media and blog posts like this one, I am constantly popping into photoshop to do some light image manipulation.
Can I use a ComfyUI workflow to make this process easier?
This is not only for effect, it was actually really easy to find a model that does exactly this and then find a workflow that was made exactly for this purpose.
Here is what I did, I went to huggingface.co, typed background removal into the search box and found this one:
https://huggingface.co/briaai/RMBG-1.4
Then I looked for a ComfyUI workflow that used the model. First I found a set of custom nodes for this model. Nodes are the building blocks of workflows. The workflow is made up of many nodes.
Following the instructions on the github was easy enough, but what you always have to remember is that the models used are large and not typically included in the github repos. You either have to use git lfs or download the models manually.
I downloaded the model manually from here.
Then I made sure the downloaded model, model.pth was in the folder specified. There is a file called put model here.txt that is a valuable guide.
Now, I will stop and restart my ComfyUI installation. Then clear the workspace, leaving me with a blank workspace.
Right click, and select add node. If everything went correctly, I now have a new node option, BRIA RMBG.
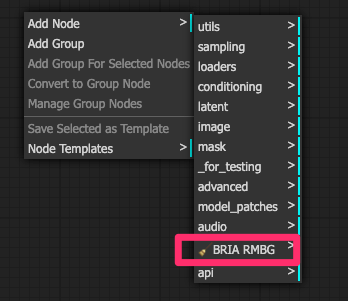
If I click on that I have two options:
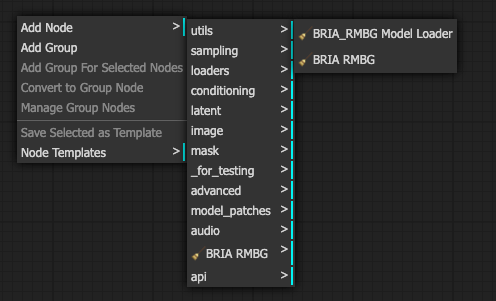
I know from my limited experience that I will have to load the model. So I am going to select the model loader first.
This leaves me with this model loader.
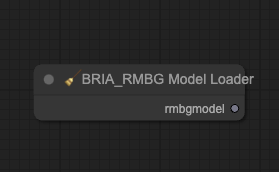
What’s cool is that the nodes know their required input and output. So I can click and drag from the dot next to rmbgmodel and ComfyUI will give me a list of options for the next node.
Here is what that looks like:
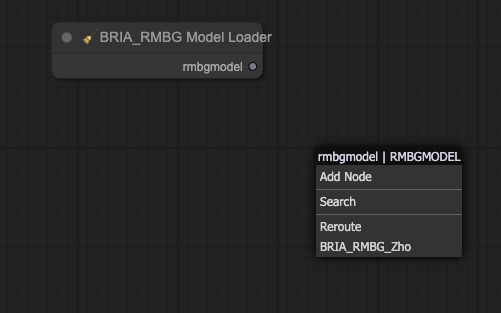
I select BRIA_RMBG_ZHO, which loads the next node.
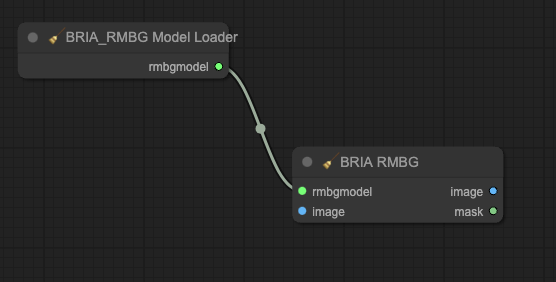
On this node, I see two image options, one input and one output. If I click on the blue dot next to the image on the left and drag it out, I am again presented with a list of options.
I select load image. When I do the same thing from the right image, I am presented with a different set of options. For this one I will select preview image.
At this point, I am ready to test the output of my comfyUI workflow. I load a sample image into the load image node, and click queue prompt.
Within a few seconds, the preview image appears with the background removed.
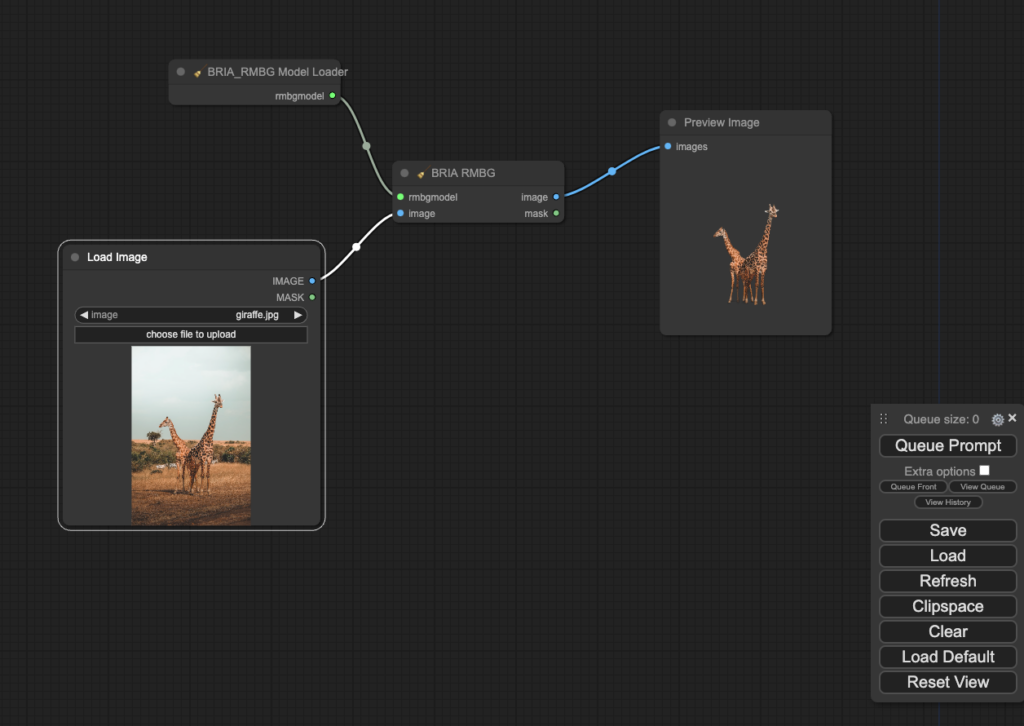
It was honestly pretty shocking when it worked. If your workflow is not working, the most common issue is missing the model. Make sure you have downloaded it and placed it in the correct folder.
Save the ComfyUI Workflow
Getting background removal to work that quickly is pretty impressive. What’s even more impressive if the fact that I can now save this workflow to use at a later date or to share it with a friend that needs the same functionality.
Click on the save button and you are prompted to save the current workflow. Choose the name of your liking and download the json file to your computer.
Now you can load this workflow whenever you want to use it, just click on the load button and upload the saved json file.
If you are having issues with your workflow, or would just like to skip through the process, you can download the ComfyUI workflow from this github library.
Leave a Reply